WinCC programming instructions refer to the guidelines and procedures for creating and modifying automation projects using Siemens WinCC software. This software is used for developing Human Machine Interface (HMI) applications and Supervisory Control and Data Acquisition (SCADA) systems for various industrial applications.
How to export language-dependent texts

Use the Text Distributor to export language-dependent texts to CSV files or TXT files. The Text Distributor creates several files that all begin with the same name.
| Note No import of texts with WinCC V6 format to WinCC as of version V7.2 WinCC as of V7.2 supports Unicode: You cannot import texts in WinCC V6 format to WinCC as of version V7.2. Texts that you export from WinCC as of version V7.2 cannot be imported with an older version. |
Text file export settings
Check the export settings for text files. For this purpose, select the project in WinCCExplorer and then select “Project properties” > “Options” from the shortcut menu. “Export Text files as Unicode” is set automatically by
default.
Example
Enter the name “Mixing_station” in the “File prefix” field. Select the “*.txt” format in the “File format” field. The following files will be created among others:
- Mixing_station_Languages.txt
- Mixing_station_AlarmLogging.txt
| Notice |
| Invalid file format If you are using “*.csv” as the export format, Excel converts the Unicode file into an ANSI file. If you want to edit the exported data with Excel, select the “*.txt” file format during export. |
Languages available for export and import
The Text Distributor offers all languages that are listed in the Text Library. You can export and import languages that originate from different regions.
For example, if you want to export Asian text from WinCC < V7.2, the corresponding system locale (operating system language) must be set in your operating system. Only then will the associated languages be available.
“English” is always available.
| Note WinCC V6 format If you want to obtain an export file compatible to WinCC V6 when exporting, select the “Export” command in the “Tools > TextLibrary V6.x format”. Unknown objects If a picture contains “unknown objects”, the export or import of the picture is aborted immediately and “Unknown” appears in the information window. |
Procedure
| Open the Text Distributor by double-clicking in the WinCC Explorer or select the menu command “Tools > Text Import & Export…” in Graphics Designer. Select or clear the editors from which you want to export text. If necessary, check or uncheck the individual objects of the editors. In the “Export files” area, select the path where the export files are to be saved. Enter a meaningful name in the “File prefix” field. All export files are created with a name that begins with this description. Select the desired format,”*.txt” or “*.csv”, in the “File format” field. Specify the settings for the text export in the “Graphics Designer” editor. Activate the “Select pictures” option if you only want to export the text from selected pictures. Select the desired pictures using the “Selection” button. Activate “One file per picture” to create a separate export file for each picture. Activate the “Update referenced texts” option after having edited or configured the “Text list” and “AlarmControl” in Graphics Designer. This updates the texts linked to the Text Library prior to the export. If you want to export individual languages, select the languages in the “Languages” section using the “Selection” button. Specify how to handle existing texts in the “Existing texts” section. Activate the “Delete existing texts” option to delete existing export files. Activate the “Replace existing texts” option to replace existing export files. Activate the “Keep existing texts” option to prevent overwriting of existing export files. Start the text export by clicking the “Export” button. |
The export files are created and saved in the select path.
Structure of the “_Languages” Files WinCC
The “<Description>_Languages.csv” file is created. The file specified
the default settings for font type, font size, etc. for each language.
| Note If font type, font size, etc. are configured for the language-dependent text in the “Graphics Designer”, the settings in the “Graphics Designer” editor are applied. |
The “*_Languages.csv” is structured as follows:
- [Header] The header has two lines. The file type is entered in the first line: . The headers are entered in the second line. This line indicates which information is entered in the following columns:
- LanguageName: Name of the language
- LanguageID: Language code
- FontName: Name of the font type used
- FontSize: Size of the font type
- FontBold: “Bold” font type
- FontItalic: “Italics” font type
- FontUnderlined: Underline
- Information for each language The following lines contain the corresponding entries for each language created.
Example:
| <Languages> | ||||||
| LanguageName | LanguageID | FontName | FontSize | FontBold | FontItalic | FontUnderlined |
| English | 1033 | Arial | 9.75 | False | False | False |
| German | 1031 | Arial | 9.75 | False | False | False |
| French | 1036 | Arial | 9.75 | True | False | False |
| Italian | 1040 | Arial | 9.75 | False | False | False |
| Spanish | 1034 | Arial | 9.75 | False | False | False |
Importing data records WicCC
You can import data records from third-party applications or other WinCC projects in the WinCC Configuration Studio. These data records must be available in “Office Open XML Workbook” format. Files of this format have the “.xlsx”
extension and can be opened and edited in spreadsheet programs.
| Note You cannot undo the import of data records. |
Requirements
- The data records you load may not be in use by any other application.
- The connections contained in the data records must be available by their name in WinCC Configuration Studio.
Procedure
| Select the required editor in the navigation area. Select “Import” from the shortcut menu of the editor. The “Select file” dialog opens. Select the file to import. |
The data records will be loaded. A progress bar is displayed.
Selecting cells, areas, rows, and columns
You can select cells, areas, rows, columns, or all data in the data area in order to, for example, copy the selected data or paste contents. Specific applications are described in the documentation of the corresponding editors.
Overview Construction of files with text from the Text Library WinCC
Use the Text Distributor to export language-dependent texts to CSV files or
TXT files. During export, the Text Distributor creates several files that all
begin with the same description.

Example:
You enter description “Mixing_station” in the “File prefix” field. In the
“File format:” field select “*.txt”. The following files are created:
- Mixing_station_Languages.txt
- Mixing_station_AlarmLogging.txt
- …
Export Files
A different number of files are created depending on which objects you select during export. The following types of files exist:
- Files for text from the “Text Library” editor
- Files for text from the “Graphics Designer” editor
- File for references texts of the “Graphics Designer” editor
- File “<Description>_Languages.csv” or
“<Description>_Languages.txt” This file is always created. This file specifies the following for the text:- Language-specific font type
- Language-specific font size
- …
in the “Graphics Designer”, the settings in the “Graphics Designer” editor
apply.
Use the Text Distributor to export language-dependent texts to CSV files or
TXT files. During export, the text from the Text Library is saved in the
following files:
- <Description>_AlarmLogging.txt or <Description>_AlarmLogging.csv
- <Description>_DataManager.txt or <Description>_DataManager.csv
- <Description>_LifeBeatMonitoring.txt or <Description>_LifeBeatMonitoring.csv
- <Description>_PictureTreeManager.txt or <Description>_PictureTreeManager.csv
- <Description>_NoSystemtext.txt or Description>_NoSystemtext.csv
- <Name>_UserAdministrator.txt or Name>_UserAdministrator.csv
- <Description>_GraphicsDesignerReferences.txt or
<Description>_GraphicsDesignerReferences.csv
The associated files are created depending on which editors you select during
export.
| Note Information on the font type, font size, etc. of a language is entered in the “<Description>_Languages.csv” or “<Description>_Languages.txt” file. Change the entries if necessary. |
You can also generate the “<Description>_NoSystemtext.txt”, or “<Description>_NoSystemtext.csv” file. This file can contain the following:
- Text that was not found in the configuration. This can happen for the following reasons:
- The text is no longer used in the configuration.
- The text is used e.g. in the Global Script.
Structure of the Files
A separate block is created for each object type. Each block has the
following structure:
- [Header] The object type is entered here: e.g.: <MessageClassName> and a header line consisting of [ID] and the respective languages, e.g. English, German.
- Exported texts The text ID from the Text Library is entered in the following rows in the first column. The following columns contain the text in the respective language.
Example: File “Example_AlarmLogging.txt” with object blocks <MessageClassStateCome>, <MessageTypeName> and
<MessageBlocks>
| <MessageClassStateCome> | |||
| ID | English | German | Spanish |
| 2 | + | + | + |
| <MessageTypeName> | |||
| ID | English | German | Spanish |
| 8 | Alarm | Alarm | Alarma |
| 9 | Warning | Warnung | Advertencia |
| 10 | Failure | Fehler | Error |
| 11 | Process control system | Leittechnik | Sistema de control de procesos |
| 12 | System messages | Systemmeldungen | Avisos de sistema |
| 13 | Operator input messages | Bedienmeldungen | Avisos de operador |
| <MessageBlocks> | |||
| ID | English | German | Spanish |
| 14 | Date | Datum | Fecha |
Tags WinCC
Data are passed on in a WinCC project by means of tags. A tag has a data address and a symbolic name, which is used in the project. The data address is used in communication with the automation system.
- NB Designer OMRON HMI Youtube Tutorial Videos
- DOPSOFT DELTA HMI Youtube Tutorial Videos
- Wonderware Intouch Youtube Tutorial Videos
- GT Designer MITSUBISHI HMI Youtube Tutorial Videos
- WinCC Siemens HMI Youtube Tutorial Videos
- FACTORY TALK VIEW Youtube Tutorial Videos
WinCC works with two kinds of tags WinCC:
- Process tags
- Internal Tags
WinCC simplifies tag handling by means of two other object types:
- Tag groups
- Structure types
Naming conventions
| Note WinCC is case-sensitive in handling the names of tags. You cannot create tags whose names differ only with respect to case in the editor. |
| Note You may not create tags with a name starting with @. Tags with an @ prefix are created only by WinCC and PCS 7. |
When naming tags, you must respect certain conventions:
- Tag names must be unique throughout the entire project.
- Tag names are not to exceed 128 characters. This limit applies to the entire expression “Structure tag name + dot + structure type element name” for structure tag elements.
- You must not use certain characters in tag names. The characters that cannot be included in a name can be found in the WinCC Information System under “Working with projects” > “Valid characters”.
Updating Tags
In the case of process tags, the current tag values are transferred over the communication connection between WinCC and the connected automation systems in Runtime. In this instance, WinCC accesses the data area on the automation system that is defined in the tag properties. The current value of the process tag is made available by WinCC in Tag Management after it has been transferred for further processing and evaluation. Conversely, WinCC can also write data back to the automation system.
In WinCC you set the frequency of data transfer and of updating in the display. Remember while you are configuring that periodic updating of tags results in severe loading of the system and can have an adverse effect on performance.
Importing tags
You can import tags that have been exported from another WinCC project.
You can import tags from external applications. The data must be available in “Office Open XML Workbook” format with the “xlsx” file extension.
Create a Multilingual Project
The following section gives you an overview of the steps you need to take in order to configure multilingual projects. The optimal procedure is described in this chapter. Alternative procedures are described in the respective segments of
this help.
Basic procedure Multilingual Project
| Install all required fonts and input methods on your operating system. If you are configuring in non-Latin fonts, the relevant fonts must be available as Small Fonts. Activate the languages to be configured in your operating system. Your Windows documentation will tell you exactly how to do this. Use the operating system of your computer to set the language that is used for programs and program parts that do not support Unicode. Install WinCC with all languages that are available as dialog language for the WinCC user interface. If you install languages at a later point in time, the standard text for these languages is not automatically put into the Text Library. When you create a new project, the WinCC GUI language is the language you selected for the installation of WinCC. When launched again, WinCC opens in the WinCC GUI language last set. If you use a language that is not provided with WinCC as the configuration language: Make sure that the standard text records of these languages do not exist as translations in WinCC. In this case, the standard text records are entered in the current WinCC GUI language in the Text Library. You can translate these texts later or directly enter the language in the “Text Library” editor before changing to the project language. Specify whether to export text files in Unicode in the “Project properties” > “Options” dialog. Configure your project in a language with which you are familiar. This project language later serves as a basis for the translation of the texts. Export the text records with the Text Library. If you have created picture objects with multilingual texts in the Graphics Designer, export the texts with the Text Distributor. You then have several files to translate. Translate the texts in an external editor. Re-import the translated texts. Test your translated project in runtime. |
| Note Creating the WinCC languages when copying a project If you copy your project to another computer, all WinCC languages must be installed in the project’s Text Library of the target computer. You may have to install the missing languages in the project’s “Text Library” editor and may have to configure the language entries for these languages. |
Principle of Language Expressions in WinCC
When using WinCC to create multilingual projects, you can set up languages at
multiple system levels. It is therefore helpful to distinguish between these
various levels by using clearly defined language expressions.
Operating System Language Expressions
The operating system language (system locale) is the language environment set
in the operating system in which applications such as WinCC run. This setting
defines, for example, the used “Code Page” in character sets.
| Note WinCC-GUI language and operating system language Set the operating system language corresponding to your WinCC user interface so that the correct code page is used and all character sets are correctly displayed. Alternatively you can use an operating system in the corresponding language. Information about the operating system language and code pages can be found in your Windows documentation. |
| Note WinCC under Windows 7 / Windows 8 Set the language in the operating system of your computer whose code page is used for non-Unicode program parts. For more information, please consult your operating system documentation. |
Operating system user interface language Expressions
The operating system user interface language is the language in which the GUI of operating system is displayed. All Windows menus, dialogs and info texts are displayed in this language. During configuration, some system dialog boxes are displayed in WinCC Configuration in the operating system user interface language, for example, standard dialogs such as “Open file” and “Save as”.
The operating system user interface language can only be switched with multilingual operating systems.
WinCC GUI language Expressions
The WinCC GUI language is the language of the project interface in WinCC Configuration, i.e. the language in which the WinCC menus, dialog boxes and help are displayed during configuration. You can set any language as the WinCC GUI language installed during setup. The maximum installation includes: German, English, Italian, Spanish, French, Japanese, Korea, Chinese (Simplified), and Chinese (Traditional).
You need a “License Key USB Hardlock” to work with Asian languages.
The language that you selected for the installation of WinCC is set as the WinCC GUI language when you first start WinCC. The next time you start WinCC the interface is displayed in the WinCC GUI language that you set up last.
Set dialog language for the WinCC user interface centrally in WinCC Explorer, “Extras” menu. Select a language you are familiar with as the WinCC GUI language for configuration.
| Note User interface language of WinCC and of them operating system If the current WinCC GUI language is not the same as the operating system user interface language, the standard dialog elements of certain WinCC editors remain unchanged and continue to be displayed in the operating system user interface language. This applies to standard buttons, such as “Cancel”, and standard system dialogs, such as “Save as”, “Open file” or “Print”. In order to display these elements in the desired language, you need to set the operating system user interface to the same language as you are using for the WinCC GUI language. |
Project language
The project language is the language to be used for the project you are creating. You can create a project containing multiple project languages in order to make several languages available in runtime.
| Note Operating system languages as configuration languages In addition to the languages installed with WinCC you can select any other language supported by your operating system as the project language. Of the operating system languages, WinCC <V7.2 only supports the respective primary languages, e.g. English (USA) but not English (GB), Chinese Traditional (Taiwan) but not Chinese Simplified (PR China). |
In each case set up the project language directly in the editor you are using for configuration, for example, in the “Alarm Logging” editor or the “Graphics Designer” editor. After switching the configuration language, the user interface remains the same in WinCC Configuration. Only the language of the texts which you create for your project is switched. The current project language is displayed in the status bar of the respective editor.
Runtime language
The Runtime language is the language in which the project is displayed in Runtime. You may set a Runtime language in WinCC in which the project will start in Runtime. The language must be set up in the text library.
When creating a project containing multiple languages, configure operating elements which will allow the operator to change the Runtime language.
| Note Runtime language Always select one of your configuration languages or the Runtime default language as the Runtime language. |
Runtime Default Language
In the computer properties in WinCC Explorer, a Runtime default language may be set which applies to graphics objects.
If, for a specific text, there is no translation available into the current Runtime language, the text is shown in the configured Runtime default language. If the text is not available in this language “???” is displayed.
Default Runtime Language for Objects
The default Runtime language is English. The default Runtime language is the language used for texts of a WinCC object, such as AlarmControl or TableControl, if no translation of the respective Runtime language is available. This mainly affects the title and column headers of the WinCC Controls if the Runtime language is not one of the languages installed with WinCC. In the languages installed with WinCC the controls are displayed correctly. This does not apply
to texts and their translations stored in the Text Library.
Tags WinCC
Data are passed on in a WinCC project by means of tags. A tag has a data address and a symbolic name, which is used in the project. The data address is used in communication with the automation system.
WinCC works with two kinds of tags WinCC:
- Process tags
- Internal Tags
WinCC simplifies tag handling by means of two other object types:
- Tag groups
- Structure types
Naming conventions
| Note WinCC is case-sensitive in handling the names of tags. You cannot create tags whose names differ only with respect to case in the editor. |
| Note You may not create tags with a name starting with @. Tags with an @ prefix are created only by WinCC and PCS 7. |
When naming tags, you must respect certain conventions:
- Tag names must be unique throughout the entire project.
- Tag names are not to exceed 128 characters. This limit applies to the entire expression “Structure tag name + dot + structure type element name” for structure tag elements.
- You must not use certain characters in tag names. The characters that cannot be included in a name can be found in the WinCC Information System under “Working with projects” > “Valid characters”.
Updating Tags
In the case of process tags, the current tag values are transferred over the communication connection between WinCC and the connected automation systems in Runtime. In this instance, WinCC accesses the data area on the automation system that is defined in the tag properties. The current value of the process tag is made available by WinCC in Tag Management after it has been transferred for further processing and evaluation. Conversely, WinCC can also write data back to the automation system.
In WinCC you set the frequency of data transfer and of updating in the display. Remember while you are configuring that periodic updating of tags results in severe loading of the system and can have an adverse effect on performance.
Importing tags
You can import tags that have been exported from another WinCC project.
You can import tags from external applications. The data must be available in “Office Open XML Workbook” format with the “xlsx” file extension.
Multi-User Projects
Clients are migrated together with the associated multi-user project.
When migrating multi-user projects, proceed in exactly the same way as in the migration of single user projects.
Make a backup copy of the project before the migration. You can rely on this copy of the original project to retrieve your data if migration fails.
Multi-user System with One Server
In a multi-user system, all required data is transferred to the server when migrating the multi-user project.
No data is stored on clients created in multi-user projects. Therefore, no client projects are created on the WinCC clients in the new WinCC version either. The settings necessary for the WinCC clients and respective preferred
server are defined in the multi-user project.
Following migration, a package must be created in the multi-user projects. If an existing package was deleted for this, the newly created package must have the same name.
In the “ServerData” editor, activate the “Automatic import” setting under “Implicit Update”. This provides all necessary data to clients which do not run their own project.
Multi-user System with Several Servers
If clients which run their own project were used in your original project, migrate each client project separately. Proceed in exactly the same way as for a single user project or a multi-user project. After migration, create new packages on the servers and load them onto the client. If existing packages were deleted, the newly created packages must get the respective names of the deleted packages.
It is possible that the original system uses several clients with their project with the same configuration and runtime data. In this case, migrate one client with their own project and copy to the other WinCC clients. Use Project
Duplicator for the configuration data. Then load the packages of the respective servers on each client.
| Note The following restrictions apply after the migration of multi-user systems: Access to clients: Automatic, simultaneous booting of several clients is no longer possible. Each server in the system can be activated by using the “Simatic Shell” dialog for remote access. Deactivating servers and clients in multi-user systems: An automatic, simultaneous booting of several servers and clients is no longer possible. Each server in the system can be deactivated by using the “WinCC Projects” dialog for remote access. |
Microsoft SQL Server for WinCC
WinCC requires Microsoft SQL Server 2014 Service Pack 1 in the 32-bit version. SQL Server is included automatically in the WinCC installation.
Microsoft SQL Server 2014 SP1 32-bit
The corresponding user rights must be set up for accessing the SQL Server data. Read the notes in the section “Defining access rights in the operating system“.
You can find information on licensing of the SQL Server under “Licenses and Licensing“.
When you install WinCC/Connectivity Pack, the required connectivity components are installed along with the Microsoft SQL Server.
SQL server instance “WinCC”
During installation, a new “WinCC” instance with the required settings is created with Microsoft SQL Server.
This instance is always installed in English. The language in which existing SQL server instances have been installed has no effect on this. Existing instances are not affected by the Service Pack.
“WinCC” instance after removing WinCC
When WinCC is removed, the “WinCC” SQL server instance remains installed and must be removed manually for licensing reasons.
Installation of SQL Server Express
SQL-Express is installed in the following cases:
- Installation of “WinCC client”
- Installation of the WinCC V7 demo version
Requirement for the installation of SQL-Express
The Windows user name of the user performing the installation must not
contain any space characters.
Migrate SQL Server 2000 databases
WinCC projects that were created with versions prior to WinCC V6.2 SP2 include database settings of the SQL Server 2000.
To access databases with SQL Server 2014 that were created with versions prior to SQL Server 2005, you must change the compatibility setting.
To do so, use the SQL Server Management Studio up to maximum SQL Server 2008. You connect the database using the *.MDF file, change the settings and remove the database once again.
Edit all databases that are part of your WinCC project:
- Databases in the local WinCC project
- Distributed systems: Databases on all PCs of the WinCC system
- Databases on the file server
- Databases on an archive server
- Swapped-out databases
Requirement
- You have created backup copies of the databases in the WinCC system. Back up the associated *.LDF file for each *.MDF file.
- The SQL Server up to version SQL Server 2008 is installed on the
PC.
Procedure
| Open the SQL Server Management Studio. Connect to the WinCC instance. Enter the following path in the “Server name” field: <Computer name>WINCC Select the entry “Append” in the shortcut menu of “Databases”. The “Append databases” dialog opens. Click “Add”. The “Search database files” dialog opens. Select the project database and confirm with “OK”. Select the item “Properties” in the shortcut menu of the database. The “Database Properties” dialog opens. In the “Options” view, the field “Degree of compatibility” has the entry “SQL Server 2000 (80)”. In the “Degree of compatibility” drop down list under “Options” select the entry “SQL Server 2008 (100)”. Confirm your entries with “OK”. Select the item “Tasks > Disconnect” in the shortcut menu of the database. The “Disconnect database” dialog opens. Confirm your entries with “OK”. The connection to the database was disconnected. Repeat steps 3 to 9 for each database that is part of the WinCC project. |
Result
The WinCC project can be migrated.
WinCC Migration Diagnostics
When a fault occurs, clear the fault in a copy of the migrated project. Then
restart the migration.
Errors During WinCC Migration
An error during the migration of a component does not interrupt the migration. The Project Migrator writes an error message in a diagnostics file and processes the next components.
Check the list of migrated components after migration. Double-click the list entries that contain errors or warnings to view the error in a “.txt” file.
Cancelation of Migration
You may restart an aborted migration after having eliminated all errors. Use
a backup copy instead of the project containing the migration errors.
Migration after elimination of errors
You can migrate the individual components after having eliminated the respective errors. The computer name and the name of the local computer must match.
Select “Tools > Convert project data” in WinCC Explorer. Select the components that you want to migrate.
Diagnostics file
The Project Migrator saves the “MigratorLog.txt” diagnostics file to the directory of the migrated project. You can view this file in any text editor.
The file contains the following general information:
- Project name
- Project type
- Type of migrated data
- Start and end of migration
If an error occurs during migration, the Project Migrator writes an error message in the file.
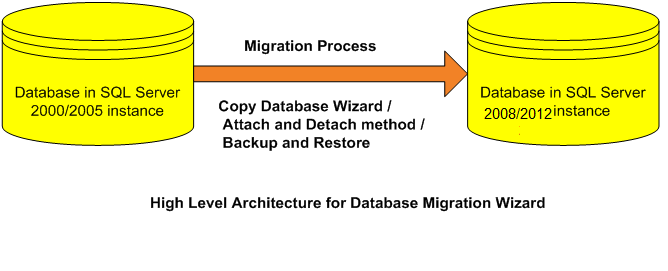
Migrate the WinCC data
This post describes the migration of WinCC projects of WinCC V6.2 SP3 or higher to WinCC V7.4.
You have two options of migrating the projects:
- Migration of the configuration data and runtime data when opening an old project
- Using WinCC Migrator to migrate several projects in a single step.
There is no difference between single-user projects, multi-user projects and clients with their own projects with regard to migration.
WinCC projects before V7.2 are migrated to UNICODE. Tables that do not originate from WinCC are excluded from migration.
The time it takes to migrate a project depends on the project size and computer performance. The time it takes to migrate the runtime data varies depending on the number of messages and tags. The operation may take several
hours.
| Note Generate a backup copy of the project prior to migration. You can rely on this copy of the original project to retrieve your data if migration fails. If you have used a DDE connection in WinCC prior to V7.0, you must remove this connection prior to migration. DDE is no longer supported as of WinCC V7.0. |
Using WinCC Project Migrator to migrate the WinCC projects
| Open “Simatic > WinCC > Tools > Project Migrator” in the Start menu of the operating system. Project Migrator opens with the “CCMigrator – Step 1 of 2″ start window. Select the project directory in which the WinCC project is located by clicking the button “…”. If migrating several projects, select the corresponding paths of the directories that contain the WinCC projects. Set the language of the computer on which you have created the project or projects. The language version that was set in the OS language options for non-Unicode programs or in the system locale is set by default. Click “Migrate”. The “CCMigrator – Step 2 of 2” window opens. Project Migrator displays the migration steps. Wait for successful completion of the migration. The migration of a project may take several hours. If migration was successfully completed, the Project Migrator sends the following message: “WinCC project migrated successfully”. Click “Finish”. |
Licenses and Licensing WinCC
The WinCC software is protected and can only be used in its full measure with a valid license. Each installed software and option used requires a valid license for unrestricted operation of WinCC. The license for optional packages must be ordered separately.
You will receive the necessary license keys for the installation of license as follows:
- As storage medium with license keys
- Via the Internet (online software delivery)
License which are installed for use in WinCC are transferred from the storage medium to a local drive and are unregistered on the storage medium.
| Note Furthermore, the licensee confirms that the software (SW) contains licensed software by Microsoft Corporation or its subsidiaries. Thereby, licensee agrees to be bound by the terms and conditions of the appended license agreement between Microsoft SQL Server and end user, and to fulfill same. |
Notes on license conditions
Please observe the enclosed license conditions, which are also displayed during the installation. You need V7.4 license for WinCC V7.4.
The SIMATIC WinCC software is copy-protected against unlicensed use. Additional information on license and license types may be found under “Licensing” in the WinCC Information System.
Installed license are required to enable proper operation of WinCC. If WinCC is installed without licenses, the program will switch to demo mode at start-up.
| Note It is not allowed to run WinCC in process mode without a valid license. Cumulating licenses The cumulation of more than one license per component subject to a license is only possible for the following licenses or licenses of the following options: WinCC Archive licenses WinCC/DataMonitor WinCC/WebNavigator WinCC/WebUX WinCC/IndustrialDataBridge WinCC/PerformanceMonitor SIMATIC Information Server Other licenses cannot be cumulated. Demo Mode If a license is missing for one or several components, WinCC will run in demo mode. WinCC also switches to demo mode when the maximum authorized number of process tags or archive tags is exceeded in a project. In Demo mode, you can use the WinCC software fully for a maximum of one hour. After this period, the operation of WinCC violates the license agreements. After one hour, the WinCC Explorer and the editors will be closed. In runtime, the system will request the acquisition of a valid license. This dialog will appear every 10 minutes. To exit WinCC demo mode, install the required licenses. Details on demo mode may be found in WinCC Information System under “Licensing”. Microsoft SQL Server 2014 A license is necessary to use the Microsoft SQL Server database. This license is readily available in a licensed and proper installation of WinCC. The licensed SQL server installed with WinCC may only be used in connection with WinCC. Its use for other purposes requires an additional license. These include, e.g.: Use for internal databases Use in third-party applications Use of SQL access mechanisms that are not provided by WinCC Uninstalling After uninstalling WinCC, the “WinCC” SQL server instance must also be removed. Select “Control Panel” > “Software” and then select the “Microsoft SQL Server 2014″ item for removal. Installation of Licenses You may use the Automation License Manager for installation of licenses. Licenses may be installed during installation of WinCC or after the fact. You will find the Automation License Manager in the Windows start menu in the “Siemens Automation” program group. An after-the-fact installation of a license will take effect upon restart of your computer. For the installation of licenses, the following requirements must be met: The storage medium containing the licenses must not be write protected. You can install the RC licenses on a license server for the configuration. You do not have to install the licenses on the local drive. Licenses may only be installed on a non-compressed drive. |
Hardware Requirements for the WinCC Installation
Certain hardware configuration conditions must be fulfilled for installation.
Hardware requirements
WinCC supports all common IBM/AT-compatible PC platforms.
To efficiently work with WinCC, select a system with the recommended specifications.
| Note Unless noted to the contrary, the same requirements as for servers are applicable to single-user systems. |
Hardware Requirements
| System Requirements | Minimum | Recommended |
|---|---|---|
| CPU | Dual core CPU 2.5 GHz | Multi core CPU: 3 GHz |
| (Windows 7/8.1 32-bit) | Single-user system: 3.5 GHz | |
| Dual core CPU 2.5 GHz | Multi core CPU: 3 GHz | |
| (Windows 7/8.1/10 64-bit) | Single-user system: 3.5 GHz | |
| Dual core CPU 2.5 GHz | Multi core CPU: 3.5 GHz | |
| (Windows Server 2008 R2/2012 R2) | Single-user system/server: 3.5 GHz | |
| Work Memory | Client: 1 GB | Client: 2 GB |
| Single-user system: 2 GB | Single-user system: 3 GB | |
| Client: 2 GB | Single-user system: 4 GB | |
| Single-user system: 4 GB | Server: 8 GB | |
| Free Memory on Hard | Installation: >1.5 GB | Installation: >1.5 GB |
| Disk | Client: 1.5 GB | Server: 2 GB |
| Server: >1.5 GB | Working with WinCC: >1.5 GB | |
| Working with WinCC: Client: >1.5 | Server: 10 GB | |
| GB | ||
| Virtual Work Memory | 1.5 x RAM | 1.5 x RAM |
| Color Depth/Color | 256 | Highest (32 Bit) |
| Quality | ||
| Resolution | 800 * 600 | 1920 * 1080 (Full HD) |
1) Depending on project size and on the size of archives and packages.
2) WinCC projects should not be stored on compressed drives or directories.
3) Use the recommended value in the area “Total size of swap file for all drives” for “Size of swap file for a specific drive”. Enter the recommended value in both the “Start size” field as well as in the “Maximum size” field.
| Note In the case of online configuration, the recommended requirements are valid as the minimum requirement. |
Virtualization
The following virtualization systems are tested:
Microsoft Hyper-V 2012 R2
VMware ESXi 5.5 / 6.0
Hardware Requirements
The performance data of the virtual computers must meet the minimum requirements for WinCC clients.
You can find additional information about virtual environments with WinCC at the following URL (entry ID=49368181):
In WinCC Configuration Studio, you edit the properties of a user archive in
the “Properties” area of the “User Archive” editor.
Properties of a user archive WinCC
General properties
| Name | The name can only include numeric and alphabetic characters and the underscore character “_”. The first character must be a letter. |
| Alias | Any Unicode characters can be used as alias. |
| Multilingual alias | Option selected: The alias is copied into the TextLibrary. When the language is changed in Runtime, the alias of the archive name is also displayed in the corresponding language. The fields can be edited in the “Translation Alias” section. Translations are displayed here. |
| Type | The “Limited” option can be used to restrict the number of data records in the archive. |
| Max. number | Number of data records in the archive if “Limited” is selected as type. |
| Last change | Display only: Time stamp of last change |
Communication
| Communication type | Raw data tag: Enter a freely selectable “PLCID” as unique name of the user archive. Select a raw data tag under “Tag name”. Data manager tags: Configure the assignment of tags when creating the user archive fields. |
| PLCID | The “PLCID” must consist of exactly 8 ASCII characters and must be unique within the WinCC project. The “PLCID” is required in order for the automation system to send the process data back to the correct user archive. Do not use the “R_ID” configured in the raw data tag, since “R_ID” is only relevant for communication with the automation system. |
Close WinCC Explorer
When you close WinCC Explorer, you normally close the project that was last open at the same time.
If Runtime is activated, or if you have opened a WinCC editor, you can close the WinCC Explorer separately. The project remains open and active if it was already active. Open editors are not closed. You can open the WinCC Explorer
again from the Windows Start menu or from a shortcut on the desktop.
You can close the WinCC Explorer regardless of whether a project is open. The relevant WinCC processes continue to run in the background. When you open the WinCC Explorer again, WinCC does not need to reload the project data and the Explorer takes less time to open.
General procedure
You can exit WinCC in the following ways:
- With the Exit command in the WinCC Explorer menu bar
- With the Shut Down command in the WinCC Explorer menu bar
- With the Close button
- When you shut down Windows
- With a C action in the activated project Note After starting, WinCC always opens the last project that was
open before you exited. If the project was activated when you exited WinCC, it
will be opened in Runtime again.
Close WinCC Explorer
File > Exit
Close the WinCC Explorer with the Exit command in the File menu. The Exit WinCC Explorer dialog box is opened.
In the list box, you can select one of the following options:
| Selection | WinCC Action |
|---|---|
| Close project and exit WinCC Explorer | If active, the project is also deactivated and closed. The WinCC Explorer and all open WinCC editors are closed. |
| Exit WinCC Explorer | Only the WinCC Explorer closes. The project remains open and active if it was already active. WinCC editors remain open. |
File > Shut Down
In the File menu of the menu bar, select the Shut Down command. Depending on your computer configuration, you can exit WinCC with Shut Down and at the same time shut down the computer.
Close Button
You can close WinCC Explorer with the button in the top right corner of the window.
Exiting Windows
When you exit Windows or log off the current user, WinCC closes
completely.
C Action in the Activated Project
You can, for example, configure a button in the project with which you can exit WinCC or Windows. To do this, use the Exit WinCC or Exit WinCC or Windows dynamic wizard.
In WinCC Configuration Studio, you edit the properties of a user archive field in the “Properties” area of the “User Archive” editor.
Dynamic Wizard Editor
The Dynamic Wizard Editor is a component of the SIMATIC WinCC (Windows Control Center) software suite from Siemens. It is used to create and edit dynamic visualizations for process and machine control in real-time. The Dynamic Wizard Editor provides a graphical interface for creating and configuring dynamic graphics, animations, and alarms. With this tool, you can easily create custom HMI displays that provide real-time information about the status of your process or machine. The Dynamic Wizard Editor supports multiple languages, making it possible to create HMI displays in the language of your choice. The editor also provides pre-configured templates and objects, making it easy to create custom HMI displays without the need for programming skills.
The Dynamic Wizard Editor in WinCC allows you to create dynamic visualizations that are optimized for real-time monitoring and control of process variables, machines, and other industrial equipment. With the Dynamic Wizard Editor, you can design custom HMI displays that are tailored to your specific needs and requirements. The editor provides a variety of tools for creating and configuring dynamic graphics, animations, and alarms, including support for different types of objects, such as indicators, displays, buttons, and more.
In addition to the standard features, the Dynamic Wizard Editor also supports advanced features, such as scripting, which allows you to create custom logic for your HMI displays. You can also use the editor to create custom scripts and macros to automate tasks and streamline your workflows. Additionally, the editor provides the ability to test and debug your HMI displays in real-time, so you can quickly identify and resolve any issues.
Overall, the Dynamic Wizard Editor in WinCC is a powerful tool for creating custom HMI displays that provide real-time information about the status of your process or machine. With its intuitive graphical interface, pre-configured templates and objects, and advanced features, it makes it easy to create dynamic visualizations that meet your specific needs and requirements.
Properties of a user archive field winCC
General properties
| Name | The name can only include numeric and alphabetic characters and the underscore character “_”. The first character must be a letter. |
| Alias | Any Unicode characters can be used as alias. |
| Multilingual alias | Option selected: The alias is copied into the TextLibrary. When the language is changed in Runtime, the alias is also displayed in the corresponding language. The fields can be edited in the “Translation Alias” section. Translations are displayed here. |
| Type | Selection of the data type from a drop-down list: Number (integer): Signed 32-bit value Number (float): Floating-point number 32-bit IEEE 754 Number (double): Floating-point number 64-bit IEEE 754 Character string: Text tag, 8-bit Date/time: The input format or output format depends on the project setting. |
| Length | Only for “Character string” data type: Length of the character string. |
| Last change | Display only: Time stamp of last change |
| Archive | Display only: Name of the archive in which the field was created. |
Values
| Minimum value | Only if “Number” is selected as data type under “Type”: Lowest/highest value that can be stored in the field. |
| Maximum value | |
| Start value | Start value for the field when Runtime is started. For tags of the “Character string” type, you can, for example, enter a text to be displayed when Runtime is started. |
| Tag name | Only if the property “Communication Type” – “Data Manager Tags” is selected for the archive: Selection of the tags through which the field communicates with the AS. |
Authorizations and flags
| Read rights | By default, the user archive field has no access protection. Here you configure the access rights for read and write access to the user archive field. Select an authorization provided by the “User Administrator” from the drop-down list. If you want to use a separate authorization, you must first create the authorization in the User Administrator. Access protection for the user archive field is queried in Runtime on opening the screen of a UserArchiveControl. |
| Write rights | |
| Value required | Option selected: The field must not be empty. |
| Unique value | Option selected: A value cannot be assigned more than once. The value for the field must differ from the values for other fields. |
| with index | Option selected: The field is supported by an index for quick searches. |
Sequence
Displays the position of the field.
The position may be changed by using the shortcut menu of the row header.
When this column is shown in the table area, the “Position” property can be used to sort and filter.
Translation Alias
If the option “Alias multilingual” is selected under “Properties” –
“General”, the translated texts for the “Alias” are displayed here. You can edit the texts here.
The field “Alias(ID)” displays the ID of the text for the alias in the “Text Library” editor.
Customer Support and Technical Support

You can reach the SIMATIC hotlines at the times specified in the following
table. The SIMATIC hotline employees speak German and English. The Authorization
hotline offers French, Italian or Spanish customer support in addition to German
and English.
Technical support
| Nuremberg | (GMT +1:00) |
| Service Hours | Monday – Friday, 8:00 to 17:00 (CET/CEST) |
| Phone | +49 (0)911 895 7222 |
| Fax | +49 (0)911 895 7223 |
| http://www.siemens.com/automation/support-request |
An overview of the Technical Support is available at the following URL:
Automation Value Card (AVC)
The Automation Value Card (AVC) provides extended Technical Support and is
available 24 hours every day of the week. Information on the AVC can be found at
the following URL:
SIMATIC Customer Online Support
Service and Support
An overview of the support offering for our products is available at the
following URL:
In Product Support, for example, you will find downloads of firmware updates,
service packs and useful utilities.
Online Help is available so that you can successfully use the Support
offering. Open the Online Help by selecting the corresponding button on the
Internet site or at the following URL:
WinCC FAQs
WinCC Online Support with information on FAQs (Frequently Asked Questions)
may also be found at the following URL:
Product Information
SIMATIC WinCC
Go to the following URL for additional information about WinCC products:
SIMATIC Products
Go to the following URL for additional information about SIMATIC
products:
Useful Links:-